
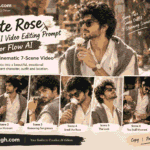
Thalapati Vijay Trending Helicopter AI Video Editing Prompt creation has changed the way creators turn simple photographs into eye-catching short videos. What once required a professional film set, multiple cameras, vehicles, locations, and a large production team can now be experimented with using AI video generation tools and a well-planned prompt.
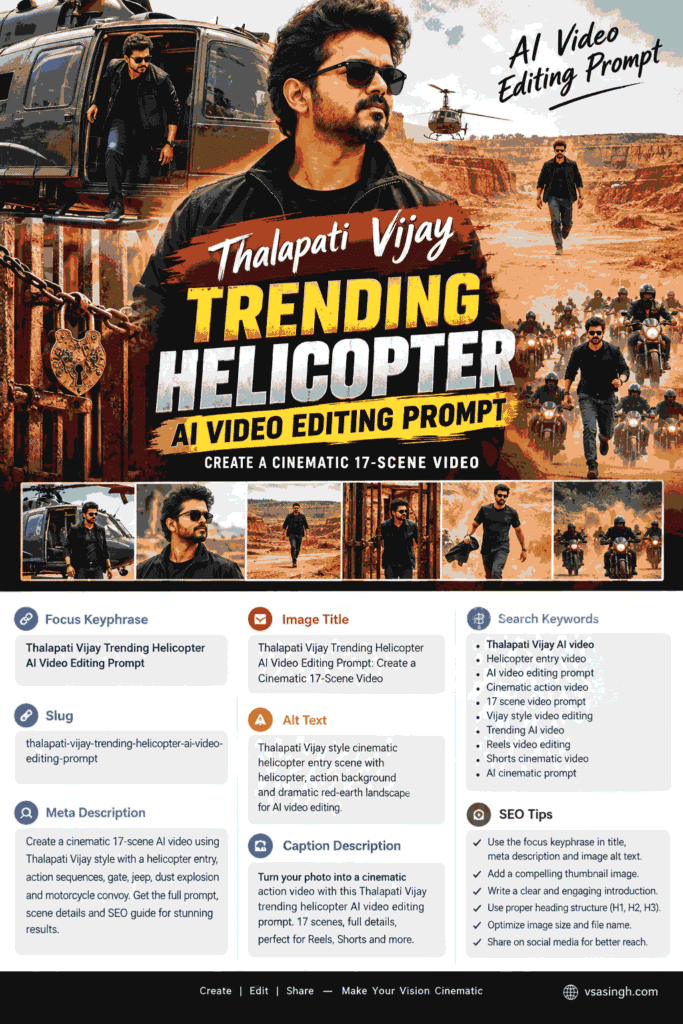
One of the cinematic styles currently attracting attention is the helicopter-entry action video, where a person appears to arrive by helicopter and then moves through a dramatic landscape filled with cinematic elements such as rocky terrain, an old gate, a jeep, dust effects, and motorcycles.
The visual style has a strong action-film feel. South Indian Thalapati Vijay AI Prompt Instead of showing one continuous AI-generated clip, the concept uses several connected scenes. Each shot has a different camera angle, movement, and purpose, while the character, environment, clothing, and lighting are kept visually consistent.
In this guide, vsasingh.com explains how you can create a similar Thalapati Vijay Trending Helicopter AI Video concept using a reference image and a detailed multi-scene prompt.
The goal is not simply to generate random clips. The idea is to create a sequence that feels like different shots from the same cinematic production.
Important: If you use the likeness of a real person, celebrity, or public figure, make sure your use follows the rules of the AI platform and any applicable rights or permissions.
What Is the Thalapati Vijay Trending Helicopter AI Video?
The concept is built around a dramatic action-style entrance.
A character arrives from a helicopter and walks through a red-earth quarry environment. As the video progresses, the surroundings become more cinematic. An old iron gate, a parked jeep, dust clouds, and a group of motorcycles are introduced one after another.
The character remains the central focus throughout the sequence.
What makes this type of video interesting is the combination of several visual techniques:
- Helicopter arrival
- Low-angle camera shots
- Cinematic close-ups
- Wide landscape frames
- Slow confident walking
- Gate-opening transition
- Dust explosion
- Motorcycle convoy
- Dynamic camera movement
- Warm action-film color grading
The entire concept is designed for a 9:16 vertical video, making it suitable for short-form content such as Instagram Reels and YouTube Shorts.
However, the same creative approach can also be adapted for other video formats.
Why a Detailed Prompt Matters
When creating a multi-scene AI video, a short instruction such as “make an action movie video from this photo” usually isn’t enough. cinematic Thalapati Vijay AI Prompt
The AI needs to understand several things at the same time.
For example, it needs to know:
- Who the main character is
- What the character is wearing
- Where the story takes place
- What objects should appear
- How the camera should move
- What happens in each scene
- How the lighting should look
- What the overall color style should be
- Which details should remain consistent
Without these instructions, the viral Thalapati Vijay AI Prompt may create visually attractive clips that don’t match each other.
The first scene might have one outfit, while the next scene changes the clothes. The quarry might suddenly turn into a completely different location. The helicopter could disappear or change design.
A carefully structured prompt reduces these inconsistencies and gives the video a more unified appearance.
What You Need Before Creating the Video
The first thing you need is a good reference photograph.
Your reference image acts as the visual starting point for the character. helicopter entry Thalapati Vijay AI Prompt
For better results, select an image where:
- The face is clearly visible.
- The hairstyle can be identified.
- The photograph is reasonably sharp.
- The face is not covered.
- The body is visible enough for the AI to understand proportions.
- Lighting is not extremely dark.
- There are no major objects covering the person.
A clear reference image can make it easier for the AI system to maintain similar facial and physical characteristics across multiple shots.
Keep in mind that trending Thalapati Vijay AI Prompt generation is not perfectly predictable. Even with a strong reference image, small differences between scenes can still happen.
Character and Visual Setup
Before generating the individual scenes, establish a master description for the character.
Use the uploaded reference photograph as the primary visual reference for the person’s facial appearance, hairstyle, skin tone, body proportions, height, and general physical characteristics.
The character should remain visually consistent throughout the complete sequence.
Avoid unnecessary changes to the person’s appearance between scenes.
Outfit progression
The character’s clothing should develop naturally throughout the video.
At the helicopter-entry stage, use navy-blue trousers with black sneakers.
For the middle portion, use a black jacket or black top, navy jogger-style trousers, black sneakers, black sunglasses, and a black wristwatch.
Later, during the dust-action sequence, the jacket should have been removed. The character can hold it in one hand while wearing a black T-shirt.
This small clothing progression gives the video a sense of continuity.
The Cinematic Environment
The entire sequence should take place in one consistent environment.
Imagine a dramatic red-earth quarry under bright daylight.
The location should include:
- Rust-colored rock formations
- Layered quarry walls
- Red dusty ground
- Small eroded rock mounds
- A dark green helicopter
- Visible helicopter tail assembly
- An old iron gate
- Decorative padlock and chain
- A parked jeep
- Jeep side mirror
- Thin antenna
- Black motorcycles
- Dust in the atmosphere
- Distant green hills
- Pale open sky
The environment should remain recognizable from the beginning to the end.
Changing locations between scenes can make the trending Thalapati Vijay AI Prompt video feel like a collection of unrelated AI clips instead of one continuous sequence.
Recommended Visual Style
For the overall appearance, use a warm cinematic action-film look.
The visual treatment should include:
Lighting: Bright natural daylight
Color: Warm earthy tones
Environment: Red and rust-colored terrain
Contrast: Strong but realistic
Details: Sharp cinematic textures
Skin: Natural-looking tones
Atmosphere: Light dust and environmental haze
Camera: Dynamic but controlled movement
Format: 9:16 vertical
Resolution: 1080p
The objective is to make every scene look as if it belongs to the same movie.
Complete 17-Scene AI Video Prompt
The following is the main creative structure for the video.
You can use the master character and environment instructions together with the individual scene descriptions.
1: The Helicopter Entrance
- Start with an extreme close-up of the character’s lower leg and black sneaker.
- The character is stepping down from an open helicopter door. Navy trousers are visible as the foot reaches the helicopter’s metal skid.
- After the initial close-up, slowly reveal more of the character.
- He grips the door handle and looks outside through the partially opened door.
- Sunglasses should remain visible.
- The camera should feel controlled and cinematic rather than extremely fast.
- This first shot establishes the helicopter arrival and immediately creates an action-movie atmosphere.
2: A Powerful Portrait
- Move into a close-up portrait.
- The character looks upward and slightly to the side.
- His expression should remain calm and serious rather than exaggerated.
- The black jacket is visible.
- The helicopter structure should remain in the background but softly out of focus.
- Use shallow depth of field so that the character becomes the clear visual focus.
- Natural sunlight should fall across the face without creating an artificial appearance.
3: Moving Away From the Helicopter
- Switch to a wide shot.
- The character begins jogging across the red quarry terrain.
- The helicopter remains behind him.
- Its main rotor sweeps across part of the frame, adding movement to the shot.
- A layered red quarry wall should appear in the background.
- The camera can track the character from a slight distance.
- The scene should feel like the beginning of a larger action sequence.
4: Helicopter Detail Shot
- Instead of focusing directly on the character, shift attention back to the helicopter.
- Create a sharp close-up of the helicopter’s tail rotor and antenna assembly.
- The metal components should be detailed and realistic.
- In the deep background, the character appears as a small, softly blurred figure walking across the red terrain.
- This creates visual variety and gives the sequence a more cinematic editing rhythm.
5: Low-Angle Face Shot
- Return to the character.
- Use a low-angle close-up of his face.
- The character wears sunglasses and maintains a calm, confident expression.
- Part of the helicopter’s tail structure can remain blurred near the top of the frame.
- Behind him is an open pale sky.
- The low camera position makes the character appear visually prominent without requiring exaggerated body proportions.
6: The Confident Walk
- Now create a medium full-body shot.
- The character walks forward through the quarry.
- He briefly touches his collar or beard with one hand while continuing to move naturally.
- His black top, navy trousers, black sneakers, sunglasses, and wristwatch remain consistent.
- The terraced red-rock quarry wall should fill the background.
- Use smooth tracking movement rather than abrupt camera changes.
7: Adjusting the Collar
- Move into a tighter shot.
- The character adjusts his collar with both hands.
- He looks toward one side instead of directly at the camera.
- A helicopter rotor blade appears blurred diagonally in the background.
- The focus should remain on the character’s face and upper body.
- This scene works as a short character-focused moment before the story moves toward the gate sequence.
8: The Locked Gate
- Introduce the old iron gate.
- Start with a detailed close-up of an ornate padlock and chain attached to the gate.
- Show the metal texture clearly.
- Then transition to the same lock and chain after being removed, lying on the dusty red ground near the character’s shoes.
- The change from locked to unlocked should be visually clear.
- Keep the lighting and color treatment consistent with the earlier scenes.
9: Opening the Gate
- Now focus on the character’s hand.
- He reaches toward the old gate and pushes it open.
- His black wristwatch should be clearly visible.
- The gate begins moving slowly.
- The camera follows the hand and gate movement while keeping the quarry environment recognizable.
- The action should look natural rather than mechanically animated.
10: Worm’s-Eye View
- For the next transition, place the camera almost at ground level.
- Look upward toward the gate as it swings open.
- The character’s legs and black sneakers appear behind the gate.
- Warm sunlight shines through the opening and falls across the red terrain.
- The low perspective creates a dramatic reveal.
- This is one of the shots that can make the sequence feel more like a professionally planned action scene.
11: Extreme Portrait
- Return to the character’s face.
- Start with an extremely tight close-up.
- The sunglasses remain in place.
- His expression should be calm and intense.
- Then slowly pull the camera backward into a tighter portrait composition.
- Warm sunlight should highlight the natural texture of the face.
- Avoid making the skin look overly smooth or artificial.
- The facial appearance should remain consistent with the original reference photograph.
12: Open Landscape Moment
- Move to a large wide frame.
- The character stands alone in an open section of the red quarry.
- Small eroded dirt formations and rocky mounds are scattered around him.
- He first spreads both arms outward.
- After a brief pause, he transitions into a confident hands-on-hips pose.
- The pale sky should occupy a large portion of the frame.
- This scene provides a visual break from the tighter shots and allows the environment to become part of the story.
13: Jeep Foreground Composition
- Introduce the parked jeep.
- Instead of placing the jeep directly beside the character, use it as a foreground framing element.
- The jeep’s side mirror and thin antenna should appear slightly out of focus.
- The character remains visible beyond it.
- He looks downward with a thoughtful expression.
- The red terrain behind him stays softly blurred.
- This type of foreground composition adds depth and makes the shot feel less like a standard AI portrait.
14: The Dust Action Shot
- Now increase the energy.
- Create a dynamic shot of the character running directly toward the camera.
- Behind him, a large burst of dust rises from the red terrain.
- His jacket has already been removed.
- He carries it loosely in one hand while wearing a black T-shirt.
- His arms should move naturally as he runs.
- The dust should match the surrounding terrain and sunlight.
- Avoid making it look like a separate smoke effect pasted behind the character.
- The camera should move backward smoothly while maintaining focus on the approaching character.
15: Throwing the Jacket
- Continue directly from the previous action.
- The character throws the jacket toward the camera.
- Use a close-up perspective.
- The jacket moves quickly toward the foreground and has natural motion blur.
- The character’s face remains sharp and focused.
- The background contains the same warm red-earth environment.
- This shot should feel like a dramatic transition into the final action sequence.
16: Motorcycle Convoy
- Now move into the largest and most energetic shot of the video.
- Create a wide cinematic frame showing a convoy of black motorcycles.
- Several riders can perform controlled wheelie-style movements in the foreground.
- The character runs through the center of the convoy.
- Dust rises around the motorcycles and fills parts of the frame.
- Red rocky terrain and distant green hills remain visible in the background.
- Use a subtle dark circular vignette around the frame to enhance the cinematic appearance.
- The shot should feel energetic without becoming visually chaotic.
17: Final Walk
- End with a closer shot of the character walking through the motorcycle convoy.
- His hands rest naturally near his pockets.
- His expression remains calm.
- The motorcycles and riders are softly blurred in the background.
- Light dust continues to move through the environment.
- Use smooth tracking camera movement as the character walks toward the final frame.
- The ending should feel confident and cinematic rather than rushed.
Full Technical Direction
For the complete sequence, maintain these settings wherever supported by the AI video tool:
Aspect Ratio: 9:16
Resolution: 1080p
Visual Style: Cinematic action film
Lighting: Natural daylight
Color Grade: Warm and earthy
Camera Movement: Dynamic but smooth
Environment: Red-earth quarry
Character: Consistent with reference image
Clothing: Follow the planned outfit progression
Location: Remain consistent throughout
Atmosphere: Natural dust and environmental haze
If a watermark is required for your own project, keep it small and unobtrusive in the bottom-right corner. For a tutorial published on vsasingh.com, use your own branding rather than carrying over another creator’s watermark.
How to Generate the Video Step by Step
1: Select Your Reference Image
Start with a clear photograph.
The image should give the Thalapati Vijay helicopter video AI Prompt enough information to understand the character’s facial appearance and general physical proportions.
Avoid heavily edited photographs where the face has been changed by filters.
A natural-looking reference usually provides a better starting point.
2: Open an AI Video Generator
Use an AI video platform that supports Thalapati Vijay AI video editing prompt image references or image-to-video generation.
For example, Google Flow is designed for AI-assisted filmmaking and video creation.
The exact interface and available features can change over time, so use the options currently provided by the platform.
3: Upload the Reference Photo
Upload your selected image through the platform’s reference-image or image-to-video workflow.
Where supported, keep the same reference image available for all scenes.
This gives the AI a consistent visual starting point.
4: Add the Master Instructions
Before generating individual scenes, provide the character description, clothing information, location details, visual style, aspect ratio, and consistency instructions.
This establishes the overall visual direction.
5: Generate the Scenes
Instead of expecting one huge generation to produce all 17 scenes perfectly, consider creating the scenes as individual clips when the platform supports that workflow.
This gives you much more control.
For example, if Scene 10 has a problem with the gate, you can regenerate Scene 10 without affecting Scenes 1–9.
Why Generating Individual Clips Can Help
AI video models sometimes interpret long prompts differently from one generation to another.
Breaking a cinematic story into individual scenes can make editing easier.
You can review each clip and check:
- Is the face consistent?
- Is the clothing correct?
- Is the location correct?
- Is the camera angle correct?
- Is the lighting similar?
- Are the objects realistic?
- Does the movement look natural?
If everything looks good, place the clips together in the planned sequence.
Editing the 17 Clips Together
Once the scenes are generated, arrange them in this order:
1 → 2 → 3 → 4 → 5 → 6 → 7 → 8 → 9 → 10 → 11 → 12 → 13 → 14 → 15 → 16 → 17
Do not randomly rearrange the clips.
The sequence has been designed to gradually move from helicopter Thalapati Vijay AI Prompt arrival to walking shots, then to the gate, dust action, and motorcycle finale.
A simple editing timeline can make the story feel much more connected.
Add Music and Sound Effects
Music can significantly change the atmosphere of a short cinematic video.
You can use suitable background music that matches the action style and that you have the right to use.
Additional sound effects can include:
- Helicopter rotor sound
- Footsteps
- Gate movement
- Metal chain sound
- Jeep ambience
- Dust impact
- Motorcycle engines
- Passing vehicles
- Cinematic impact sounds
The sound should support the visuals instead of overpowering them.
Don’t Overuse Transitions
One common mistake in short-form editing is adding too many transitions.
For this particular cinematic style, simple cuts can often work better.
Use transitions only where they help connect two shots.
For example, the transition from the helicopter Thalapati Vijay trending video AI Prompt to the quarry can use a smooth cut, while the gate opening can provide a natural visual transition into the next section.
The dust explosion can also act as a natural transition into the final action sequence.
How to Maintain Character Consistency
Character consistency is one of the biggest challenges in AI-generated video.
The same person may look slightly different from one generation to another.
To reduce this problem:
Keep the same reference image
Whenever the platform allows it, use the same source image.
Repeat important details
Mention the character’s hairstyle, clothing, sunglasses, body proportions, and other important visual characteristics.
Avoid unnecessary changes
Don’t introduce a new hairstyle, completely different outfit, or different lighting style unless it is part of the story.
Regenerate only the problematic clip
If Scene 7 looks wrong, regenerate Scene 7 instead of rebuilding the entire sequence.
Keeping the Environment Consistent
The quarry is effectively another character in this video.
The red soil, rock formations, helicopter, gate, jeep, dust, and hills should feel like parts of the same location.
If an AI-generated scene suddenly creates a city, forest, beach, or completely different landscape, the cinematic continuity will be broken.
When that happens, strengthen the location description in the prompt and regenerate the scene.
Maintaining the Same Color Style
Color consistency is another important detail.
Imagine watching the first five scenes with warm red and brown tones and then suddenly seeing a blue-colored landscape in Scene 6.
That kind of change immediately makes the video feel less connected.
For this concept, maintain:
- Warm sunlight
- Earthy browns
- Rich red terrain
- Natural skin tones
- Strong but controlled contrast
- Cinematic shadows
- Slight atmospheric dust
The result should look like one production rather than separate AI experiments.
Common Problems You May Face
Even a detailed prompt may not generate a perfect result every time.
Here are some common problems.
Face changes
The character may look slightly different between scenes.
Solution: Reuse the same reference image and strengthen the identity-consistency instructions.
Clothing changes
The AI may accidentally add the jacket back after it has been removed.
Solution: Clearly state the character’s clothing status for that specific scene.
Background changes
The quarry may suddenly look completely different.
Solution: Repeat the location description.
Incorrect hands
Hands can sometimes appear unnatural during complex movements.
Solution: Simplify the action and regenerate the clip.
Unnatural dust
The dust explosion may look like smoke.
Solution: Describe it as dry red-earth dust illuminated by natural daylight.
Vehicle changes
The helicopter or motorcycles may change shape.
Solution: Keep the vehicle description consistent and regenerate the affected shot.
How to Make the Video Feel More Professional
A cinematic AI video isn’t only about having a long prompt.
The final result also depends on editing decisions.
Try to create a rhythm:
Slow opening → Character reveal → Walking sequence → Gate transition → Portrait → Wide landscape → Dust action → Motorcycle finale
This gives the viewer a sense of progression.
You can also vary the camera distance:
Extreme close-up → Close-up → Medium → Wide → Close-up → Wide
This prevents every shot from looking identical.
Why the 17-Scene Structure Works
The 17 scenes are not simply a long list of random shots.
They create different stages of the visual story.
Opening
Scenes 1–5 introduce the character and helicopter.
Character section
Scenes 6–7 focus on the walking and styling moments.
Transition
Scenes 8–10 introduce and open the gate.
Visual pause
Scenes 11–13 slow the sequence down and establish the wider environment.
Action
Scenes 14–15 increase the energy with the dust explosion and jacket throw.
Finale
Scenes 16–17 bring in the motorcycle convoy and end with the character’s final walk.
This structure creates variation while maintaining a simple visual storyline.
Tips for Better AI Video Results
Here are some practical tips from the vsasingh.com perspective for creators experimenting with this type of content.
1. Start with the image
Don’t underestimate the importance of your source photograph.
A poor reference image can make identity consistency much harder.
2. Keep prompts organized
Separate the prompt into character, clothing, location, visual style, and scene instructions.
This makes it easier to edit individual sections later.
3. Don’t change everything at once
If a generated scene looks wrong, identify the exact problem first.
Was it the face? Background? Camera? Clothing?
Then modify that part.
4. Watch the first and last frames
A clip may look good in the middle but have a strange opening or ending frame.
Check transitions carefully before assembling the final video.
5. Keep the camera movement realistic
Fast camera movement can look impressive, but too much motion can create blur and distortion.
Smooth tracking shots often produce a more believable cinematic effect.
6. Use sound intelligently
A good sound layer can make an AI-generated video feel much more complete.
7. Don’t depend entirely on one generation
AI video creation is often an iterative process.
Generate, review, correct, and regenerate where necessary.
Can You Use This Style for Other AI Videos?
Yes.
The same storytelling framework can be adapted to many other concepts.
For example, you could replace the quarry with:
- A desert
- A mountain road
- An industrial location
- A historical setting
- A futuristic city
- A jungle environment
- A beach
- A large open field
The key idea remains the same:
Character + Environment + Camera + Action + Continuity
Once you understand this structure, you can create your own original cinematic prompts instead of simply copying trending examples.
Final Words
The Thalapati Vijay Trending Helicopter AI Video Editing Prompt is a good example of how detailed scene planning can transform a basic photograph into a cinematic short-video concept.
The helicopter entrance creates the opening hook. The quarry walking sequence establishes the character. The old gate provides a visual transition, while the jeep and dust explosion increase the action. Finally, the motorcycle convoy creates a large-scale ending.
The most important part of the workflow is consistency.
Use a strong reference image, keep the character description stable, maintain the same environment, follow the clothing progression, and use a similar color grade across every clip.
If the AI makes a mistake, don’t assume the entire project has failed. Regenerate the problematic scene and continue building the sequence.
For creators experimenting with AI video generation, the bigger lesson is that a good prompt is not simply a collection of keywords. It is a visual plan. The more clearly you describe what should happen, where it should happen, and how the camera should capture it, the easier it becomes to build a connected cinematic sequence.
At vsasingh.com, we aim to make AI trends easier to understand for creators who want to experiment with new tools without getting lost in complicated instructions.
So, if you are planning to create your own helicopter-entry action video, start with a clean reference image, build your scenes one by one, keep the visual identity consistent, and refine the clips during the final edit.
The result may not be perfect on the first attempt—and that’s completely normal with AI video generation. The best results often come from testing individual scenes, correcting small inconsistencies, and gradually building the final video.

Leave a Reply